How to do a Company CSV Import in Linkedin

Linkedin now lets you import a list of companies (they use the language ‘Accounts’) by uploading a CSV inside Sales Navigator team edition. Let’s do a walkthrough on when to use this feature and how it works.

Why import companies as a CSV?
Really it all comes down to one thing – saving you time creating account lists. There are two primary use cases where this will benefit sales teams the most.
1.) Creating a prospecting list when the data originated outside Linkedin.
2.) Saving existing clients to a ‘Do Not Contact’ list.
How to do a company CSV import in Linkedin
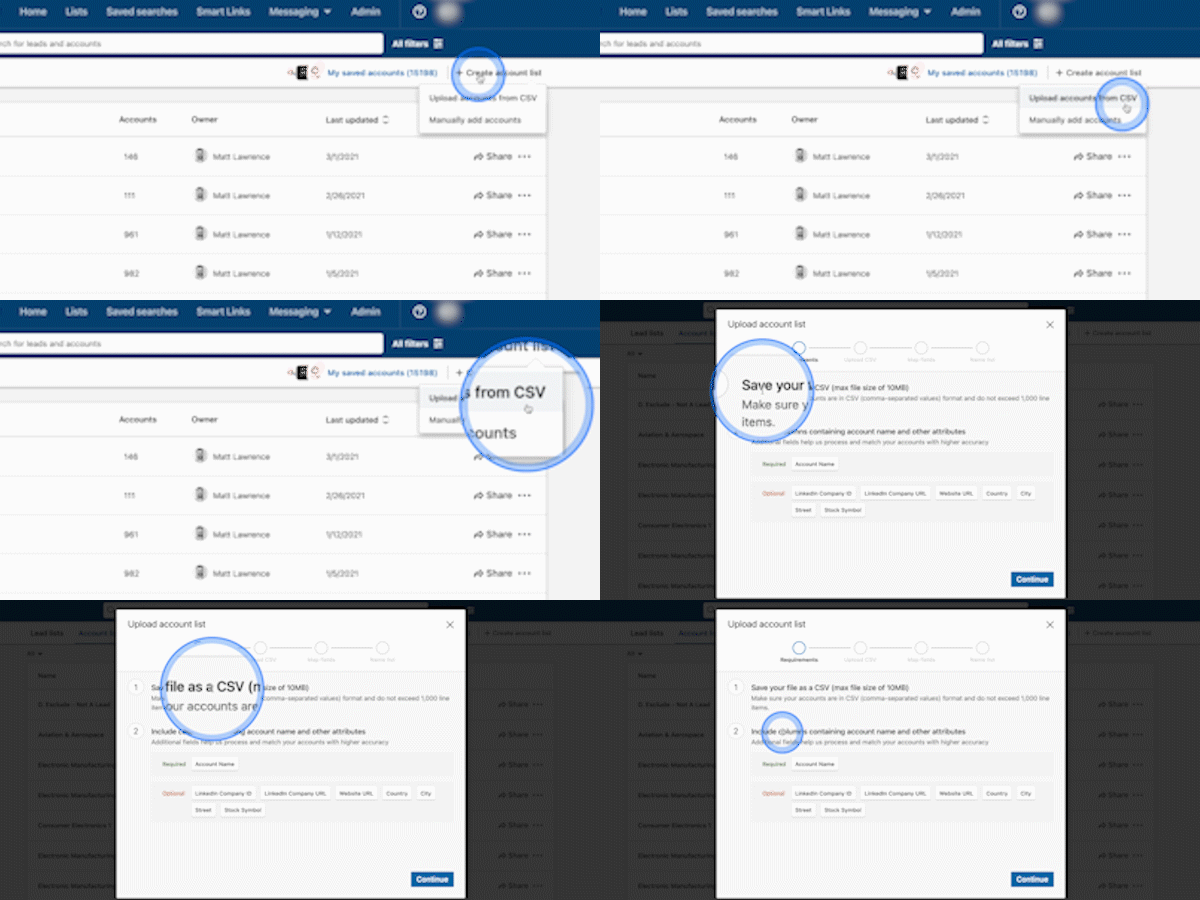
Navigate to your Account Lists > + Create account list > Upload accounts from a CSV

There are 4 stages to importing uploading your csv to Linkedin:
1.) Requirements overview
2.) Upload file
3.) Map columns
4.) Name list
Step 1 – Requirements Overview

The file requirements are straightforward:
– Needs to be a CSV
– Max 10MB in size
– Max 1000 line items (same as account list max size)
– Account (company) name
Optionally you can include:
– Column Headers for easier mapping
– LinkedIn Company ID (numerical ID of the page)
– LinkedIn Company URL
– Website URL (of the company)
– Country
– City
– Street
– Stock Symbol
Step 2 – Select and Upload CSV
Select your CSV and upload. Below is a screenshot of the one we used for this example:

Step 3 – Map fields

You’ll see a list of fields Linkedin allows you to match alongside a dropdown section where you choose to associate the corresponding fields in the CSV you imported.
Step 4 – Name your list
In this example we imported existing clients to easily exclude them from prospecting. Therefore, we’ll name the list ‘CLIENT LIST – DO NOT CONTACT.’

After mapping your fields and choosing ‘Finish’ Linkedin will find the companies for you. You’ll see a ‘% complete‘ next to the list name you just created.

Once complete, review the companies in your newly created list for errors.


